Backlot Delivery Instructions for Fulfillment Partners
• General Instructions
• Understanding Metadata Fields
If you are a Content Partner, please review the Backlot Delivery Instructions for Content Partners.
General Instructions
To deliver assets through Backlot, select the Source Requests you want to fulfill using the check boxes on the left-hand side and then click on the “Deliver” icon located in the bulk action bar on the bottom right-hand side of your screen. 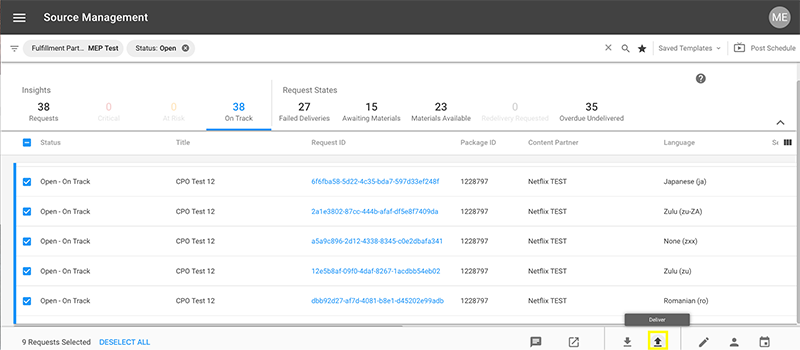
After clicking the “Deliver” button, the delivery interface will open a new browser tab. The delivery UI will list the details of each Source Request. The colored bars on the left of each Source Request will be red until a file(s) has been uploaded, selected, and the metadata has been completed for each Source Request.
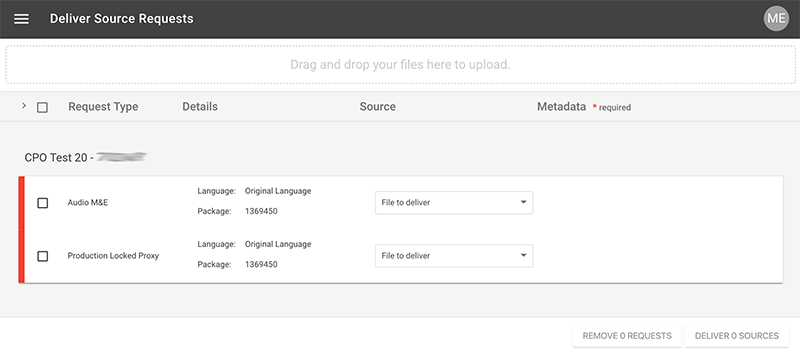
Now drag and drop the files needed for the Source Requests into the web page's drag and drop area. Aspera will launch and perform the transfers for you.
After uploading the files into the UI, you are able to select the "File to deliver" drop-down per Source Request and associate the correct asset(s) to each Source Request. Once the files have been selected, you will need to complete the necessary metadata as prompted.
Alternately, you can attempt to see if the system recognizes your file types via "Auto Match Files". Fuzzy matching logic will attempt to associate each file with the appropriate Source Request. To attempt the match, click on the target icon next to the word “Source” in the column bar near the top of the screen. Any files that do not get auto-matched must be selected from the drop-down “File to Deliver” box.
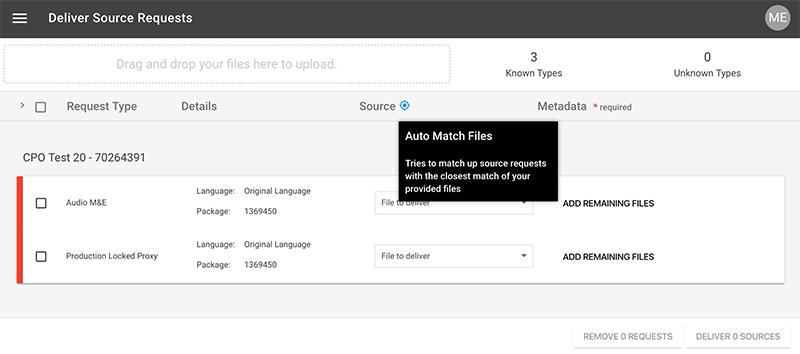
Each file is matched to the appropriate Source Request with any possible metadata fields completed. Continued initiatives will improve the fuzzy logic matching for language code, channel mapping, and other strings contained in the file name.
At this point, you will need to complete any empty metadata fields as prompted within the red drop-down boxes. The red asterisk (*) indicates which fields are required values.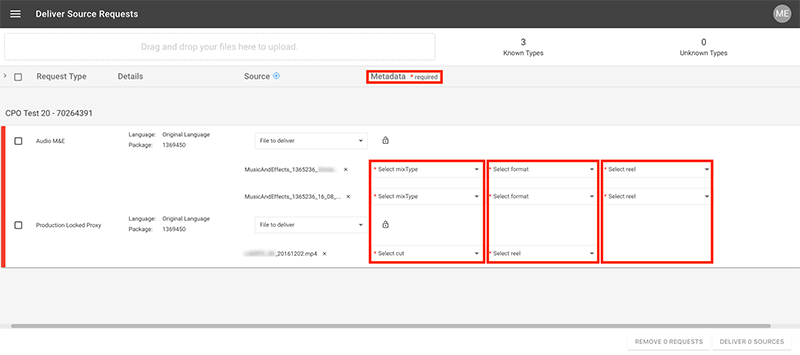
You can complete each metadata field independently or you can select the "Sync Metadata" icon to ripple the metadata values from the first row through to the others when applicable. 
When all the appropriate metadata values are complete each row will be marked green, seen on the left side of the browser window.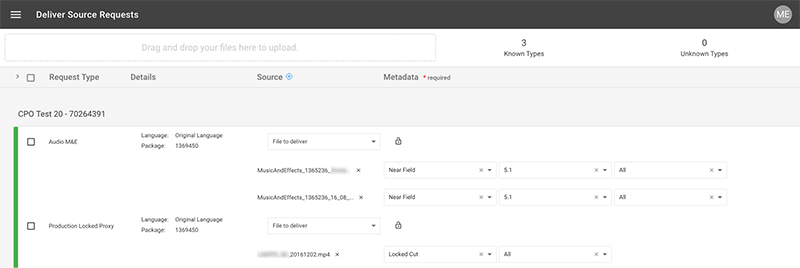
When you are ready to deliver the files to Netflix, select the individual checkboxes per line item or select all, this indicates your desire to initiate the upload. Once the boxes are checked, you will see the "Remove" and "Deliver" buttons in the lower right of the window become activated. You may upload or remove the requests from the UI at this point.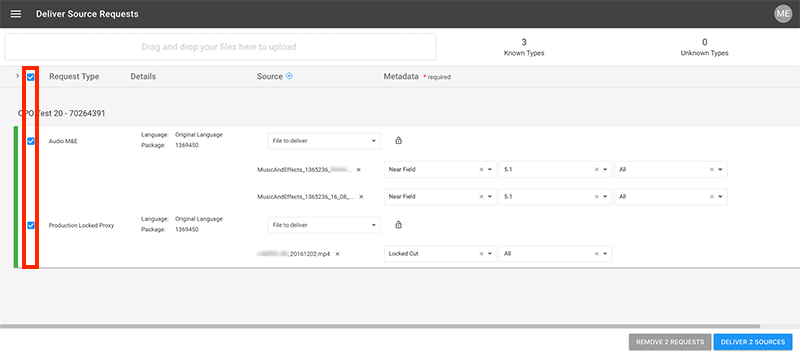
Selecting the green “Deliver x Sources” button will launch Aspera Connect in your browser. If you do not have Aspera Connect, you will be prompted to download and install Aspera Connect.
VIDEO A/V MUX
Audio Language Code and Audio Channel Mapping are required metadata fields for primary video assets.
The optional metadata field “Select Burned Language Code” can only be used when you have a title, pre-approved by Netflix, that has burned-in subtitles throughout the entirety of program. Do not use this field to indicate when a program has sporadic lower-thirds, location descriptions, or the occasional foreign language dialogue line.
SECONDARY AUDIO / DESCRIPTIVE AUDIO
Audio Channel Mapping is a required metadata field for secondary audio assets.
SUBTITLES / FORCED SUBTITLES / SDH+CC
There are no required metadata fields for timed text assets at this time; however, if you have a HermesID you should be including this value upon delivery. Please also note the optional metadata field where you may select SMPTE or MEDIA timing. If NO value is selected, the asset(s) will process through as SMPTE timing. For additional details regarding when to select SMPTE vs MEDIA, please review our Help Center article, here.
AUDIO PRINTMASTER
The Printmaster is primary master source audio with all dialogue, music and effects tracks mixed into a specific arrangement, e.g. 5.1 Surround sound, stereo, mono. The reference audio when comparing downstream derivatives.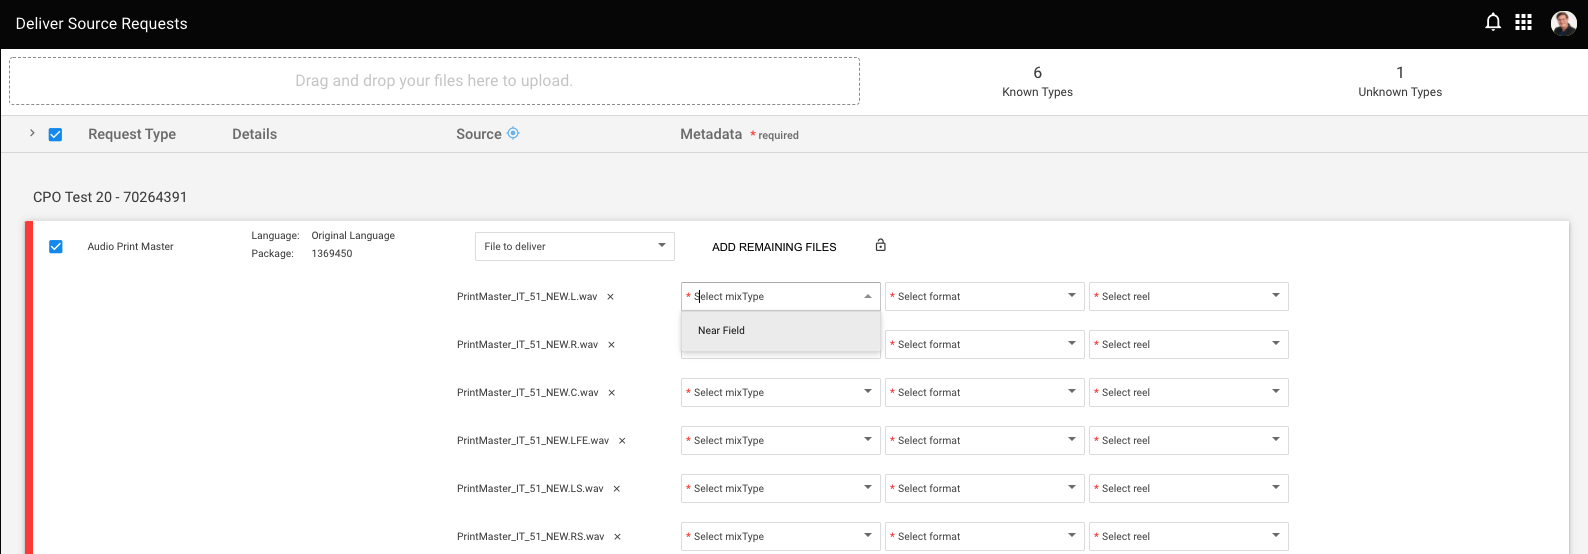
Mix Type and Format are required metadata fields for Printmaster assets. The available option for Mix Type is Near Field. Near Field mixes are created particularly for playback in smaller rooms, such as living rooms, home theaters, etc.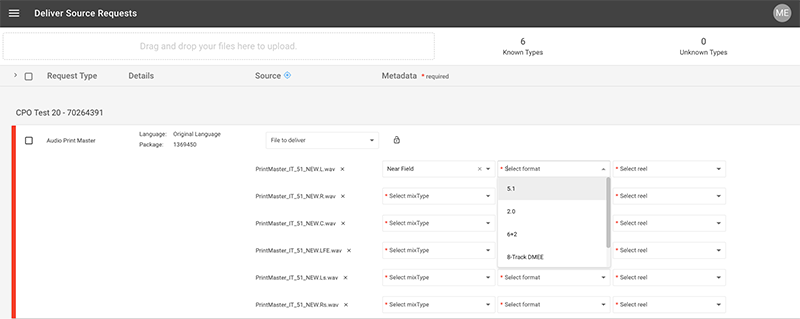
Format refers to the configuration of the audio assets. Before delivering, please be certain to label each audio file with the channel identified in the filename (similar to the above image).
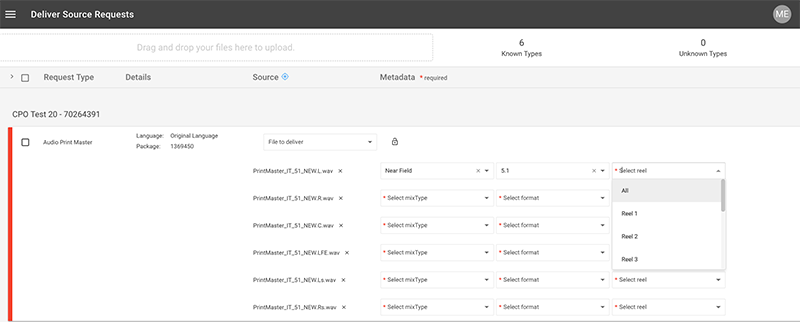
Reels refer to how the audio is segmented. If your entire audio channel is self-contained within one file, then select "All". If your audio is partitioned into reels, specify the appropriate reel that file corresponds with.
AUDIO M&E
The Audio M&E is an audio mix excluding program dialogue for the purpose of localization or marketing. It only contains Music & Effects.
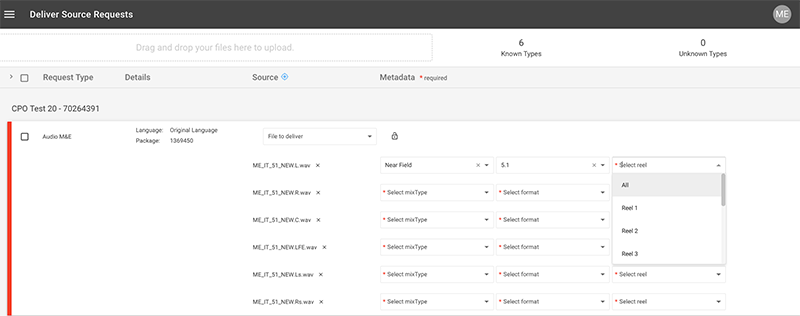
Mix Type and Format are required metadata fields for Audio M&E assets. The available option for Mix Type is Near Field. Near Field mixes are created particularly for playback in smaller rooms, such as living rooms, home theaters, etc.
Format refers to the configuration of the audio assets. Before delivering, please be certain to label each audio file with the channel identified in the filename (similar to the above image).
Reels refer to how the audio is segmented. If your entire audio channel is self-contained within one file, then select "All". If your audio is partitioned into reels, specify the appropriate reel that file corresponds with.
LOCKED PROXY
A Locked Proxy refers to a video reference file made from the creatively approved picture edit sequence. Content is fixed for timing, no further changes to the edit sequence should occur and all further versions should match precisely. Does not contain finished elements such as color timing, foley, music, ADR, VFX etc.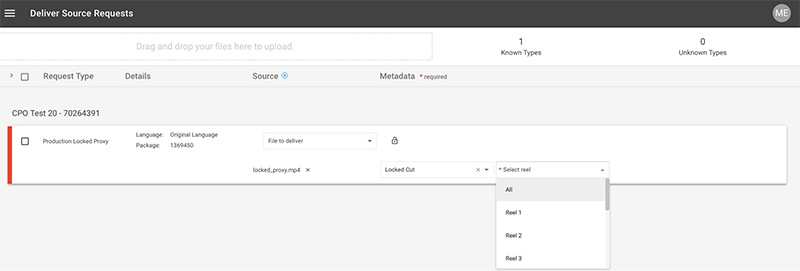
Select Cut and Reels are required metadata fields for Locked Proxies.
Change Log
3/24/2021
- Updated MixType metadata options for Printmaster and Audio M&E assets